Tuesday, December 21, 2010

Chocolate Chip Cookie Dough Balls

The pictures are getting worse, but the food's still good! I kept seeing these cookie dough balls popping up and was trying to figure out how the cookie was getting called "cookie dough". Basically, there is less liquid in the recipe and you make them tall so the middle doesn't get all the way cooked, but they're still safe to eat. I went with The Chic Life's recipe since she made seven different experimental batches (wouldn't you love to be her taste tester??). You get the flavor of cookie dough without the risk of the raw egg. Don't overbake, or you'll be scratching your head at the recipe title when the insides of your cookies look like regular cookies!!


Chocolate Chip Cookie Dough Balls

1 1/2 cups unbleached all purpose flour
1/2 tsp salt
1/4 tsp baking powder
1/8 tsp baking soda
1/2 cup brown sugar
6 tbsp butter, softened
1 tbsp sugar
1 egg
1/2 tsp vanilla
1/2 cup semi-sweet chocolate chips (I used 1/3 cup)

Whisk together flour, salt, baking powder and baking soda.
Cream together sugars and butter.
Add vanilla and egg to butter mixture.
Mix wet ingredients into the dry ingredients. DO NOT OVERMIX!
Fold in chocolate chips. Refrigerate dough for at least twenty minutes. Meanwhile, preheat oven to 350 F.
Roll dough into small balls and spread evenly on a baking sheet, about 2-3 inches apart.
Bake dough for about 11 minutes, or until the top still looks like dough and the bottoms are slightly golden brown.
Cool on baking sheet for 10 minutes, then serve.

Monday, December 20, 2010

2010's Must-Try Recipes

It's almost time for Christmas break!! I feel like it just snuck up on us so fast. Break starts in two days and I am really excited for some relaxing family time!
I was thinking about my favorite things I've made and the things I make again and again while I was on the treadmill the other day (yes, random.) and decided to put a little list together. I know some of my readers hardly ever cook, but like to look at the recipes:), so if that's you, you should at least try some of these! They are all very simple and reliable--I only chose recipes that I've made over and over again! Let me know if you try one!!

Thursday, December 16, 2010

French Dip Sandwiches

I never thought I was a fan of French dip sandwiches...I mean, who would purposely eat a soggy sandwich? My opinion has forever changed because I absolutely loved these sandwiches. Everything about them was great, from the ease of preparation to the taste and satisfaction factor. Try these out soon!French Dip Sandwiches

from Allrecipes via Macaroni and Cheesecake

Meat is enough to make about 6 sandwiches

2 lb beef chuck roast
1/2 tbsp minced garlic (used 2 cloves)
1/2 tbsp dried rosemary
1/2 tbsp chopped bay leaves
1/2 cup soy sauce
3 cups water

rolls (I agonzied for-ev-er in the bread aisle..mostly because I like to look at bread...and decided on a white braided roll that I crisped up a bit under the broiler with the cheese melting on top of one half..yum!)
provolone cheese slices
1/2 cup light mayonnaise
1/4 tsp dried parsley
1/4 tsp dried thyme

Place meat in crockpot and sprinkle with garlic, rosemary, and bay leaves. Pour soy sauce and water over the meat. Cover and cook on low for about 8 hours (I cooked for close to 10, then left on "keep warm" setting and it was great two hours later). Meat should be fork tender.

Combine mayonnaise, parsley, and thyme.
Broil bread with cheese slice on top. Spread one half with mayonnaise, top with meat (I'm sure you know how to assemble a sandwich, right???). Serve with a small bowl of au jus (the juice left in the crockpot) for dipping--that is key to this being SO great!

Wednesday, December 15, 2010

White Chocolate Peppermint Popcorn


It's been long enough since I posted that my internet history didn't even recognize my site when I was typing it in! Oops! We've been eating the basics like tacos, pizza, and pancakes, and going to some basketball games. Trying to keep the budget low and rope in the calories a little, also! (tacos with ground turkey, WW pizza, WW pancakes, you know...)
This recipe definitely does not fit under calorie control. Each Christmas, we have a faculty lunch and "snack day". Every teacher (over 100 of us!) is supposed to bring a snack to put in the library and there are snacks all day and then a catered fajita bar. I am most looking forward to the fajita bar, but liked the excuse to make a new snack:)
Every year, I make just plain popcorn coated with melted white chocolate, so I was pretty excited to see this recipe on The Rookie Chef! I was so surprised with how great popcorn and mint taste together, too! This is quick and easy to make, but hard not to snack on as you go!
any picture taken after about 5:30 PM is officially even crappier than my pictures normally are...sorry!!


White Chocolate Peppermint Popcorn
2 bags microwave butter popcorn, popped (with unpopped kernels picked out!)

6 oz (1 box) candy canes, crushed
16 oz. white chocolate/white almond bark coating

2 tsp mint extract

3/4 cup chocolate chips


Stir together popcorn and crushed mints.

Melt white chocolate and stir in mint extract.

Pour melted white chocolate over popcorn and mint mixture. Stir (your hands are the best tool here!) until popcorn is coated. Lay out in single layer on parchment or waxed paper.

Melt chocolate chips and put in sandwich baggie with edge clipped off. Drizzle over popcorn. Allow to cool.

Sunday, November 28, 2010

Restaurant Style Mexican Rice

Another picture-less recipe, but another one I felt I just had to share.
I love Mexican food, whether it's eaten at home or out. I rarely order the rice because I have found very few that I actually like. If they have black beans, I get more than a little excited!
We needed a rice recipe to serve with our beef enchiladas for the fundraiser lunch and tried four different recipes. This one was awesome! After making a bunch, we put it in the crockpot, poured some hot chicken stock over it, and kept it warm until we needed it, which was really handy. It had the perfect combination of flavors--try it with your next Mexican meal!

Saturday, November 27, 2010

Oreo Cheesecake Cookies

Two giant batches later, I still don't have a picture of these beauties, but I'm posting anyway! Tasty Kitchen (PW's recipe site people can submit to) had a tutorial of these and once I showed them to my baking and pastry students, we had to try them! We wound up liking them so much that we made them a part of our meal for the teacher lunch fundraiser. One definitely does the trick since they are rich. And yes, we drizzled them with melted white chocolate--you should, too! I'll just link you to Tasty Kitchen for the recipe.

Friday, November 26, 2010

Pumpkin Ice Cream

I found this recipe from Pennies on a Platter, and it's definitely a keeper! I served it with the pumpkin spice cheesecake brownie and I was in pumpkin heaven!!


Pumpkin Ice Cream

Yield: 1 quart

5 large egg yolks
1 1/2 cups whole milk
1 cup heavy cream
1/3 cup plus 2 tbsp sugar
1/4 tsp ground ginger
1/2 tsp ground cinnamon (I used 1 tsp pumpkin pie spice in place of the ginger, cinnamon, and nutmeg)
1/8 tsp ground nutmeg
1 cinnamon stick
1/4 tsp kosher salt
1/4 cup packed brown sugar
1/2 tsp vanilla extract
3/4 cup pumpkin puree


Whisk the egg yolks in a small bowl and set aside.

Combine milk, cream, sugar, spices, and salt in a medium saucepan over medium heat. Warm until the edges begin to bubble.

While mixture warms, prepare an ice bath by placing a metal bowl insdie of another large bowl filled with ice and water. Set a mesh strainer on top of the inner bowl.

Off heat, gradually add half of the milk mixture into the egg yolks while whisking constantly.

Turn heat to low and pour yolk mixture back into saucepan. Stir constantly, being sure to scrape the bottom of the pan. Stir until the mixture thickens and coats the back of a spoon, about 165F.

Work quickly and pour mthe mixture through the strainer into the bowl sitting in the ice bath. Stir in brown sugar until dissolved. Chill mixture thoroughly in the refrigerator.

After the mixture is chilled, stir in the vanilla and pumpkin. Whisk together, then press through fine mesh strainer. Freeze in ice cream maker according to manufacturer's instructions. Freeze for at least one hour before serving.

Tuesday, November 23, 2010

Honey Glazed Steamed Carrots

These will add a little color and a sense of nutrition to your Thanksgiving table, although I plan to make them for dinners all year round. The first time I made these for the kids at school, they gobbled them up, which is always a good sign. After our Thanksgiving lunch, everyone wondered what the spice was on the carrots, and it's just honey! I think even non carrot lovers will enjoy this.


In the original recipe from Sunny Anderson, the carrots are cooked in the water, so if you don't have a steamer insert, you could do that. I prefer steamed carrots, so I steamed them. Up to you! Just don't over cook your carrots and wind up with mushy carrots!!
Honey Glazed Steamed Carrots
serves 4
salt and black pepper
1 lb baby carrots
2 tbsp butter
2 tbsp honey
1 tbsp fresh squeezed lemon juice
parsley, for garnish
Steam carrots in a steamer insert over ~1 inch of boiling water for about 15 minutes, until carrots are tender but still have a bite. Drain the water and place the carrots in the pan. Add honey, butter, and lemon juice and combine. Cook until the ingredients have formed a glaze over the carrots, about 5 minutes. Season with salt and pepper and garnish with parsley.

Monday, November 22, 2010

Soy Glazed Sauteed Green Beans

When searching for a new recipe to use for our dry heat cooking labs, I came across this recipe for green beans. Teenagers are notorious for not eating their vegetables, so I try to present them in every way I can find to get them to enjoy them! After trying these, at least three said they were the best green beans they've ever had. I'd say that was a success! I also really love these and plan to bring them for Thanksgiving this year at my in-laws! Special thanks to my lovely mom for making them for our family feast:)

Soy Glazed Sauteed Green Beans
from localgoodness.com

nonstick cooking spray
2 slices bacon, sliced into 1/2 inch pieces
1 lb frozen green beans (no need to thaw)
1/2 cup sliced red onion
2 tbsp honey
2 tbsp low sodium soy sauce
fresh ground black pepper

Spray a saute pan with cooking spray. Cook bacon over medium high heat until it begins to brown.
Add green beans and onions to pan and cook until beans are tender-crisp and onions have browned (about 15 minutes), stirring occasionally.
Combine honey and soy sauce and pour over beans. Stir mixture together, season with pepper, and cook for about 3 more minutes, or until sauce has thickened.

Make-Ahead Creamy Mashed Potatoes

It's a revelation! Mashed potatoes you can make ahead of time that don't turn mealy, starchy, and unappetizing upon reheating.


I knew I needed plenty of mashed potatoes for our family dinner, but also knew I'd have a full stove (which we most definitely did!). My grandma made some awesome mashed potatoes on Sunday, and we popped these in the oven while we were doing all the other prep. I really really loved the flavor of these taters. You'd never guess there was cream cheese in them, so don't shy away if you don't like cream cheese. You can make these up to two days ahead of time, cover and refrigerate, and reheat--how awesome is that???


I didn't get a slathered-in-gravy picture, but believe me, they were great even plain!


(click on recipe title for link to PW's recipe)
I followed her recipe with these special notes--
I used half Yukon Gold potatoes and half Russet potatoes. I also only used 5 oz of cream cheese and added in about five cloves of roasted garlic. I didn't use any seasoned salt--just plain salt and pepper.

Pomegranate Spritzer

We had a great afternoon early Thanksgiving meal with a lot of our family on Sunday. We won't get to see them on Thanksgiving day, so it was nice to be able to get everyone together. We had lots of great food, but the company was even better! Thanks to everyone for coming!
I wanted to make a drink using pomegranate (actually, I really wanted some pomegranate seeds/aryls to use for decoration and wanted to put them in a drink to make it pretty, so thought I'd find a drink using pom flavor...). I searched a little, just planning on something fizzy and pomegranate-y (nope, not a word!). Surprisingly, this recipe came from Paula Deen and there wasn't any butter in it!! It actually came from her daughter-in-law, so that's probably why:) I really enjoyed this! This would be really nice for a shower, also. If you want to make it pretty, throw in some pom seeds and a lemon twist. To sweeten it up, add a little more pomegranate.

Pomegranate Spritzer
2 parts diet ginger ale, chilled
1 part seltzer water, chilled
1 part pomegranate juice (I used a juice drink, not the concentrate--if you use the concentrate, don't use so much), chilled
Combine ingredients, garnish with pomegranate seeds and lemon twists, and serve!

Sunday, November 21, 2010

Pumpkin Spice Cheesecake Brownies

YUUUUUM!! If you're still contemplating Thanksgiving desserts, you should definitely consider this. I have never had chocolate and pumpkin together, but I love pumpkin in every form (except, as my sister pointed out today, the pumpkin pie poptart--yuck!). These have pumpkin, chocolate, AND cheesecake, so it's like three desserts in one. A small square will definitely do as they are very rich. I served them with a scoop of pumpkin ice cream--perfect combo! As a bonus, they're also really pretty!
Pumpkin Spice Cheesecake Brownies
Brownie Batter
3/4 cup butter, melted
1 cup sugar
1 tbsp vanilla extract
2 eggs
1/2 cup all purpose flour
1/2 cup cocoa powder
1/4 tsp salt
2 tsp cinnamon
Cheesecake Batter
6 oz cream cheese, softened
1 egg
1/3 cup sugar
2 tbsp flour
1/2 cup pumpkin puree
1/4 tsp vanilla extract
1/2 tsp cinnamon
1/4 tsp each ground ginger and ground cloves (instead, I used 1/4 tsp in place of the 1/2 tsp cinnamon plus 1/2 tsp pumpkin pie spice)
Preheat oven to 350 F. Grease 8x8 baking pan.
Beat together melted butter, suar, and vanilla. Add eggs one at a time, beating after each egg.
In a separate bowl, combine dry ingredients for brownie batter and stir into butter mixture.
In a separate bowl, beat cheesecake ingredients together.
Spread 2/3 of the brownie batter into the bottom of the pan. Pour cheesecake batter over the top and spread evenly. Dollop the remaining brownie batter on top of the cheesecake layer, then use a knife to swirl and even the top layer.
Bake 40 minutes, or until center is set. Cool completely,t hen chill thoroughly before cutting and serving.


Friday, November 19, 2010

Taco Soup

Another soup to add to my list of favorites! The best way to describe this is as a "taco chili". It's perfect with a little shredded cheese and a few crushed tortilla chips on top. Norris agrees that this is really great!

I used to make something similar to this in college, except with frozen chicken breasts and I would stick it in the crockpot before class and it would be ready by the evening. I would leave out the ranch seasoning and sometimes replace the tomato sauce with Rotel, which made a thick mixture that was perfect on tortillas, too. My college friends loved it!


Warning--this makes quite a bit (enough for our meal one night plus a whole week's worth of lunches). I'm sure it would freeze well if you wanted to make it all at once but not eat it all week! Just like most chilis and soups, the flavor develops more as it sits and it makes AWESOME leftovers!

Taco Soup

from Cook Like a Champion

1 lb lean ground beef or turkey (we used turkey)
1 can dark red kidney beans
1 can light red kidney beans (all standard size cans)
1 can black beans
20 oz tomato sauce
2/3 cup water
1 can corn
1 chipotle in adobo, minced PLUS about 1 tbsp of adobo sauce from can (freeze the leftover chipotles if you don't have another use for them right then)
1 pkt ranch dressing mix
2 pkts taco seasoning
your choice of toppings

Brown meat and drain. Stir in one packet of taco seasoning and 1/4 cup water. Bring to a boil, then reduce to simmer for 10 minutes.
Meanwhile, in a large saucepan, combine all other ingredients and begin to heat. Add cooked meat and bring mixture to a boil. Reduce heat to simmer and simmer for 20-30 minutes. Thin out with more water if desired.

Thursday, November 18, 2010

Low Fat Creamy Mushroom Pasta

Anybody watch Real Housewives of New York?? This recipe is from Bethenny Frankel, a "star" of that show who also had her own spin off. Yes, I am admitting that we watched both shows!! I also read her book Naturally Thin this summer and liked it for the most part--it was an interesting read at least.
We really liked this with the exception of the brand of whole wheat pasta I bought, which can easily be changed! This comes together so fast. I doubled the sauce and added 2 chopped chicken breasts. Great easy weeknight meal!

Low Fat Creamy Mushroom Pasta
adapted from Bethenny Frankel via Stephanie Cooks

1/2 box whole wheat fettuccini or linguine
8 mushrooms, sliced thin
2 chopped chicken breasts (raw)
2 tbsp olive oil
1/2 tsp. onion powder
2 tbsp butter
1/2 cup low fat sour cream
2/3 cup chicken broth
1/2 tsp salt
1/2 tsp pepper
1/3 cup parmesan cheese
Parsley and crushed red pepper flakes for garnish

Directions:
Bring water and salt to a boil.
In nonstick pan, over high heat spread out the mushrooms and the onion powder with 1 tablespoons of oil.
Sauté for approximately 5 minutes without touching or moving the mushrooms. Stir mushrooms, add chicken, and saute for another 5 minutes.
Add butter, sour cream, broth, remaining olive oil, salt, and pepper and stir to combine.
Add pasta and toss. Top with parmesan and red pepper flakes.

Friday, November 12, 2010

Pumpkin Chiffon Cake

Yum!! This light cake is a great dessert option this fall. It has the goodness of pumpkin with only 120 calories per serving. Plus I got to use my mixer to beat egg whites for the first time and it was wonderful to let egg whites go while I cleaned everything up:)
I forgot to dust the cake with powdered sugar and I was one egg short of a full recipe (Granddad, I'm sure you'll come up with a clever retort to that statement:). I didn't have quite enough sugar, so I replaced about 1/4 of a cup with Splenda. I also used a bundt pan instead of a tube pan, and I still thought it was awesome! It would be a perfect dessert to bring to any fall gathering and noone would even notice that it's a light dessert.


Pumpkin Chiffon Cake
Serves: 12
1 cup flour
1 1/4 cup granulated sugar
1 tbsp pumpkin pie spice
1 tsp baking powder
1/2 tsp salt
4 eggs, separated (save both the yolks and whites!)
5 egg whites, at room temperature
1 cup canned pure pumpkin puree
powdered sugar for dusting
Preheat oven to 325 F.
Combine flour, 3/4 cup sugar, pumpkin pie spice, baking powder and salt in a large bowl. In a separate bowl, combine egg yolks and pumpkin puree.
Using an electric mixer with a whisk attachment, whip the nine egg whites at medium speed until foamy (about 2 min).
With the machine on, gradually whisk in the remaining 1/2 cup sugar; increase speed to high and beat until stiff peaks form, about 2 minutes.
Add 1/4 of the egg white mixture to the pumpkin mixture. Fold in just until no streaks remain. Do the same with the remaining egg white mixture.
Grease a tube or bundt pan and pour batter into ban. Bake until springy to the touch and tested done, about 55 minutes.
Let cool in the cake pan for 10 minutes, then turn out to cool completely on wire rack. Dust with powdered sugar before serving.

Thursday, November 11, 2010

Baked Parmesan Tilapia

This is a very simple and quick weeknight dinner that's also pretty good for you. I have to admit that it would probably be better sauteed or fried, but I just stuck with the baked since I don't like frying and I was trying to save a few calories. But, as we all know, fat=flavor, and a little fat added in this recipe would most likely result in an awesome dish! I really liked the crunchy exterior--I followed Bella's directions for the coating of the fish, then sprayed a 9x13 glass pan and placed the fish in it. I sprayed the top of the fish with cooking spray and baked it at 425 for about 8 minutes on each side. When I flipped it, I sprayed the other side of the fish, too.

(again, just click the recipe name for the link to the original, since I didn't change anything!)

Tuesday, November 9, 2010

Poached Peaches with Blackberry Sauce

I am always challenged in my ProStart class to come up with or find recipes that are a little different than the every day things the students eat, but something that is familiar enough that they will at least try it to realize they like it. Some of the students are more than a little out of the comfort zone food-wise, but I think that in the end they appreciate trying new things!

I needed a couple of recipes for our moist heat cooking section, and I decided a poached fruit would fit the bill, but knew I couldn't poach in wine at school, so I had to come up with a little different method. I looked around for a recipe, but wasn't finding one, so I just decided to use the information that I already knew to create something.

We have been working on presentation and plating lately also, and this was a really pretty presentation before the ice cream melted--oops! It would be just perfect with a sprig of mint on top!
As a bonus, the leftover poaching liquid can be used again for something else OR it tasted really great just heated as an apple cider!


Poached Peaches with Blackberry Sauce


Serves: 12 (1/2 peach with sauce each)

2 quarts apple juice
2 quarts water
1/4 cup sugar
2 cinnamon sticks
8 whole allspice berries
6 peaches, halved and pitted

2 1/2 cups fresh or frozen blackberries
~1/4 cup sugar

Combine juice, water, and sugar and bring to a boil. The poaching liquid should be a little sweet, but not overpowering (you still want to taste the fruit--not just the liquid!)
Reduce heat to simmer and add in cinnamon and allspice. Simmer for about five minutes.

When you poach, it should be around 180 degrees--bubbles a lot, but not simmering or boiling. You can check with the thermometer if you want! When your liquid is ready for poaching, place your peaches in the liquid. They should not be touching the bottom and they should be covered with liquid (they'll normally sit toward the top, which is fine, and you can push them down with a round parchment liner or lid if you want, but I don't worry about that).


Poach the peaches for about 20 minutes. You should be able to put a small sharp knife through it without any resistance, but it shouldn't fall apart--you don't want mushy peaches.

Once the peaches are done, remove the peaches from the liquid and set aside. Leave the poaching liquid over medium high heat to reduce by half.

While the liquid is reducing, combine 1 1/2 cups of blackberries and sugar in a blender. After liquid has reduced, add in 1/4 cup of the reduced poaching liquid. Taste and adjust the sugar as necessary.

Stir in the blackberry puree with the rest of the whole blackberries.

Slice peach halves in half and put two on a plate. Top with a dollop of whipped cream or vanilla bean ice cream and drizzle blackberry sauce on top--be sure to get at least one whole blackberry on each plate! Garnish with a sprig of mint, if desired.

Monday, November 8, 2010

Cinnamon Raisin Swirl Bread

Once I was on a roll with the mixer, I couldn't stop. Plus, I had an extra hour to work with!! (I loved the extra hour, but I HATE that it gets dark so early. I have pretty much no motivation to do anything after it gets dark except go to sleep.)
I saw this recipe on Annie's Eats a few weeks ago and knew I had to make it, immediately planning to make french toast from it! The goal is to make it last until Thursday since we have Veteran's Day off and make french toast for breakfast:) We love the gooey ribbon running through it, although I'm not sure why mine is stuck only on the very sides on the bottom! The bread itself has really great flavor. Norris thinks it looks like bakery "fake" bread because of the egg wash on top. I still am trying to figure out what bakery he's been to that has fake bread!!...


(click this to see recipe from Annie's Eats)

Sunday, November 7, 2010

Heavenly Yeast Rolls


If you don't already have a dinner roll recipe for your Thanksgiving table, you should definitely consider this one!!

Can you believe I got my mixer Wednesday and didn't actually use it until Sunday?? I can't, either! I will admit that I walked by and turned it on a couple times just to make sure it worked and see it in action:) It has a perfect new home on our rearranged kitchen counter tops! It's SO nice to set the mixer to knead while I clean up everything else. Plus, I felt like I added less flour during the kneading process, which will result in a lighter product. I got a little anxious for the dough to rise--it looked perfect!! Obviously loving my new mixer:)


Our weekly menus have been pretty repetitive with all of our favorites lately. I was planning another double batch of loaded potato soup and decided to make some rolls to go with it. I went to Tasty Kitchen and found these Heavenly Yeast Rolls. They certainly smelled heavenly while they were baking, and they tasted heavenly, too!! Remember, use the bread flour to get a perfect result!


Heavenly Yeast Rolls(click the title for the link to recipe!)

Thursday, November 4, 2010

My awesome surprise!

I already knew that Norris is awesome, but today I came home to a wonderful surprise!! He has watched me knead a lot of dough and use my hand mixer a WHOLE lot (and heard me talk about entering every mixer giveaway out there!), and decided to surprise me with a Kitchenaid stand mixer!! Made for a nice weeknight surprise:)

Tuesday, November 2, 2010

Orange Pork

I always find great recipes in my AllRecipes cookbook, and this was definitely one of them. The only thing I would change for next time is to add in a bunch of veggies--julienned carrots for sure! I would also garnish with toasted sesame seeds and sliced green onions. I changed the recipe according to some suggestions I read--rather than whole chops, I cut them into cubes. I served over whole wheat noodles with steamed broccoli and we both really enjoyed it!

Orange Pork
adapted from All Recipes

Yield: 4 servings

1 tbsp olive oil
1 lb boneless pork chops, cut into cubes
1 cup julienned carrots
3/4 cup orange juice
1/4 cup soy sauce
1 1/2 tsp brown sugar
1 1/2 tsp white sugar
2 tsp water
1 tsp cornstarch
2 tbsp flour
Garnish: toasted sesame seeds and sliced green onions

Place flour in ziploc bag and toss pork in it until evenly (very lightly) coated.
Heat oil in large, heavy skillet over medium heat. Stir fry pork and carrots until evenly browned on both sides, but pork is not done all the way through. Remove pork and carrots from skillet.
Add orange juice, soy sauce, and sugar to skillet and cook for 2 minutes, scraping brown bits from bottom of pan.
In a small bowl, combine cornstarch and water to make a slurry. Stir slurry into sauce. Return pork and carrots to skillet and simmer until pork is cooked all the way through, carrots are crisp-tender, and sauce is thickened.

Monday, November 1, 2010

Outrageous Oatmeal Peanut Butter Chocolate Chip Cookies

I think the name of these is outrageous enough...
These were excellent--I love oats and peanut butter, and even though I'm not the biggest chocolate fan, I know other people like it a lot! We went to K-State homecoming this weekend and had a big tailgate with more than enough food. One of the things I brought were these cookies, which we loved!

I didn't change anything, so here's the link! If you want them to look more like the picture on All Recipe's website, chill the dough first--I think that makes a huge difference, but I didn't have the patience that particular evening!!

Wednesday, October 27, 2010

Black Bean Salsa Chili

This is a nice change for your fall soup arsenal (surely I'm not the only one who has an "arsenal" of soups??). Another recipe that's great to make a batch and have all week for work. It makes six generous servings, so there's even enough to share a little!
I got this recipe from a nice couple at my gym--they were telling me about the goats they're raising for meat, which is probably not something I'll be doing anytime soon, but they also offered me this recipe! She copied it out of some sort of magazine, and it says "Enlightened Cook" at the top. The "enlightened" part comes in the nutrition facts--puree beans to add a little bulk and use lean turkey instead of beef.
I didn't follow the part where you combine the lime juice, cilantro, and sour cream to top it with because I was bringing it in lunches, but I did squeeze the lime in at the end and I'm sure that would be excellent all mixed together for a topper!

Black Bean Salsa Chili

30 oz canned black beans, rinsed, drained, and divided
2/3 cup water
1 tbsp brown sugar
1/2 lb lean ground turkey
1 cup chopped sweet onion
1/2 cup chopped green bell pepper
1/2 cup chopped red bell pepper
3 slices of bacon, chopped (I used turkey bacon)
1 1/2 tbsp chili powder
1 tbsp ground cumin
1/8 tsp crushed red pepper
1 1/2 cups mild salsa
3 tbsp tomato paste
14 oz fat free, less-sodium beef broth (I used chicken)
1/2 cup reduced-fat sour cream
1/4 cup chopped fresh cilantro
1 tsp fresh lime juice

Combine 1 1/2 cups beans, 2/3 cup water, and sugar in a food processor and process until smooth. Combine bean puree and remaining beans in a bowl.
Heat a large saucepan over medium high heat. Coat pan with cooking spray; add turkey; brown and crumble. Remove turkey from pan.
Add onion, bell peppers, and bacon to pan; cook five minutse or until bacon and onion are lighlty browned.
Return turkey to pan; add chili powder, oregano, cumin, and crushed red pepper to pan. Stir well to coat. Stir in bean mixture, salsa, tomato paste, and broth; bring to a boil. Reduce heat and simmer for thirty minutes, stirring occasionally.
In a small bowl, combine sour cream, cilantro, and lime juice. Serve chili topped with sour cream mixture.

Yield: 6 (1 cup) servings

Per Serving: Calories: 249; fat: 4.7 g; carbs: 39 g; protein: 17 g
(nutrition facts without sour cream)

**I froze half of this and got it out the next week for lunches, and it tasted just as great!

Monday, October 25, 2010

The true depiction of "dogpile"

Sis and I took a trip to Topeka last weekend. Well, us and the dogs, that is! We somehow decided that putting three big dogs in a car with us would be a good idea, and it turned out to be pretty hysterical at least! In most pictures, I can't even figure out the jumble of paws...


Sunday, October 24, 2010

Basic Hard Candy

When the librarian at school asked my class to make 500 lollipops for Halloween, I somehow thought that sounded like a good idea. In reality, it has turned into cut fingers from handling sugar shards and spending every spare moment either making lollipops or packaging them. It's been a fun experience and the two kids in the advanced class have enjoyed making them, but I think we're all ready for it to be over!!
Thanks to Gram and Granddad (I think Gdad was the taste tester in this situation:) and their extensive research, we are plugging along on these. I remember that Gram used to make them when we were growing up, so I asked her for her recipe, and she went all out and even made a batch herself to check on yield and flavorings. Then, she even emailed me a picture of them!! So helpful!
The best part of this whole experience is that I discovered a cake shop that I have never been to. When I walked in and breathed in the scent, I knew I'd have to go back--it had everything a baker or candy maker could ever want or need!
We used the basic Lorann Oils recipe and have been flavoring them a bunch of different fun flavors and coloring them colors that have nothing to do with their flavors. Hey, they're high schoolers, they'll like whatever flavor they get!!
Thanks for your help, Gram!

Basic Hard Candy Recipe
2 cups granulated sugar
2/3 cup clear corn syrup
3/4 cup water
oil flavorings (they suggest 1 tsp per batch)
colorings (takes us about 8 drops to get the right coloring)
Blend sugar, corn syrup, and water in a saucepan. Heat over medium high heat until the mixture reaches about 280. You need it to hit 290, and it will do that when you remove it from the heat since it's still so hot. If it doesn't, stick it back on the stove and be sure it hits 290. (we didn't let it hit 290 with one batch and our taste tester about lost a tooth because they were so sticky!!)
After the bubbles have subsided, flavor and color as desired. Work quickly and stir minimally, because as you stir, the mixture cools and gets sticky.
Pour into lollipop molds (those metal ones work the BEST!) and let cool (takes about 20 minutes). Package in airtight containers.
*oh, and whatever you do, don't put your face over the hot pot after you have already flavored it--you will clear your sinuses plus breathe in cherry all day long!

Saturday, October 23, 2010

Slow Cooker Barbecue Pulled Chicken

This is a perfect weeknight meal because it can be made in your slow cooker and dinner is ready when you walk in the door!! Norris said it was "freakin awesome", so it will definitely be a repeat in our house! I assembled it the night before and had Norris turn it on at about 7:30 the next morning. We were home around 4:30 and put it on warm until we were ready to eat--it could definitely go the extra hour until you get home from work and not be burnt, though. Jenna's recipe calls for it to be on high for an hour, then turned down to low, but I just cooked it on low the whole time because who has time to run home and change their crockpot setting?? If you have a fancy schmany crockpot, maybe you can get it to do that for you!
The only thing I changed was to majorly reduce the brown sugar, which made the spice flavor more pronounced, but we really liked it that way. I doubled the recipe, so I should have used 1/2 cup of brown sugar, but actually only used about 2 Tbsp. You decide how spicy or sweet you like it!


Wednesday, October 20, 2010

Black Bean Fiesta Salad

This is a perfect salad to make at the beginning of the week and take to work each day for lunch. (although if you're doing that, I would recommend sprinkling cheese on top as you are ready to eat it) Add a piece of fruit and you have a great meal that will keep you full all afternoon! It was so pretty and colorful, but I forgot to take a picture before I brought the whole container to work. You'll have to use your imagination on this one!


Black Bean Fiesta Salad
Yield: 8 servings


3 tbsp fresh lemon juice

2 tbsp extra virgin olive oil

1 garlic clove, minced

1/2 tsp ground cumin

1/2 tsp freshly ground black pepper

25 oz black beans, rinsed and drained

1 cup frozen corn kernels, thawed

2 celery stalks, diced

1 green bell pepper, seeded and diced

1 red bell pepper, seeded and diced

1/2 red onion, finely chopped (omitted)

3/4 cup cubed reduced-fat Monterey Jack cheese (used ~1/2 cup shredded)


Combine lemon juice, olive oil, garlic, cumin, and pepper. Add everything else but the cheese and toss to coat. Stir in cheese.


Nutrition: 170 calories, 6.4 g fat, 22 g carbs, 8.5 g protein

Friday, October 15, 2010

Chicken in Walnut Sauce

This dish was different, but a great kind of different! I was apprehensive about putting cinnamon and red pepper together into my sauce, but I really enjoyed it. You could go a little light-handed on the cinnamon if you're not sure about it yourself, but I would encourage you to go ahead and try the full amount.
When I went back and re-read Stephanie's thoughts on this, I agreed with everything she said--you probably already have the ingredients on hand and it was a good kind of different! She used half the chicken of the original recipe but the full amount of sauce. I did that and wound up with about half of my sauce leftover, and we used plenty on our chicken. Definitely up to you and how saucy you like your dinner :) Besides using three chicken breasts, I followed the recipe to the letter, so I'll just link you!


Yield: 3 servings (when made with 3 chicken breasts)


350 calories per serving
40 grams protein per serving (!)

Wednesday, October 13, 2010

Soft Garlic Knots

These are the perfect accompaniment to a nice warm soup. I was so excited while I was making them because I've seen them so many places lately and have wanted to try them. I don't tackle yeast breads on weekdays, but weekends are perfect for them! These were fun to make, partly because I love working with yeast, and partly because I liked the process of shaping them. They were so easy and had little hands-on time, so you should try them soon!
Shaping the knots

no more cooking in daylight!!

the final product
mmm..can you tell how soft and pillowy they are???


I wound up using the version that I saw on Annie's Eats--I'll just link you to her so you can see her step-by-step instructions of how to shape the knots. Much easier than I thought it would be for sure. Be sure to use bread flour! If I were you, I'd use just a touch more garlic, too:)
I froze half of the recipe after shaping the knots. I put them on a waxed-paper lined baking sheet and put them in the freezer for about 45 minutes. After they were frozen solid, I put them in a freezer bag. To bake, I will put them out on a lined baking sheet and allow to thaw and rise in a warm place, then bake as directed.

Tuesday, October 12, 2010

Loaded Potato Soup

After we had this for dinner, Norris suggested that I make it for Christmas Eve. Wow! If a soup is good enough to be "Christmas Eve" soup, it must be good:)

There are some foods that I try a different recipe for almost every time, even if I like the one I tried last. It's like I need to be sure that I have exhausted all of my options before settling on a favorite. (on a side note, how do the people on those house shows sometimes buy the very first house they see?? I would be so anxious not knowing my options!!) In the case of this soup, I think I am done experimenting with potato soup recipes!


To sweeten the deal, this is a Cooking Light recipe, so you don't have to worry about trying to lighten it up, but it has all the flavor of a full fat recipe.
Loaded Potato Soup
Yield: 4 (1 1/4 cup) servings
4 (6-oz) red potatoes
2 tsp olive oil (I skipped because I didn't use the onion)
1/2 cup onion, chopped (didn't use)
1 1/4 cup fat-free, low sodium chicken broth
3 Tbsp all purpose flour (I wound up using about 4 since I used skim milk)
2 cups 1 % milk, divided (used skim)
1/4 cup light sour cream
1/2 tsp salt
1/4 tsp ground black pepper
3 turkey bacon slices
shredded cheddar cheese and thinly sliced green onions for topping
Pierce potatoes with fork and cook in microwave on high for about 9 minutes, or until tender. Cut in half and allow to cool a bit.
While potatoes cook, heat oil in saucepan and saute onion for about three minutes. (skipped this step, went straight to the broth). Add broth. Combine flour and 1/2 cup milk and add to pan along with the rest of the milk. Bring to a boil very slowly (so your milk doesn't curdle; I did this by starting on low heat and cranking it up a couple notches every few minutes, stirring frequently). Boil for 1 minute, stirring constantly. Remove from heat and stir in sour cream, salt, and pepper.
While milk mixture is coming to a boil, place turkey bacon on paper-towel-lined microwaveable plate. Microwave on high for four minutes. Crumble bacon.
While bacon cooks, peel and dice potatoes. After removing the soup from the heat, stir in potatoes (CL recommends mashing them in, but we prefer chunks over mashed potato soup) and bacon.
Top with cheese and green onion.
**This reheats beautifully! Doesn't separate or anything--perfect for lunches!

as seen on Prevention RD

Monday, October 11, 2010

Fish Tacos: FAIL!!

The other night, Norris and I planned to go out to dinner, but couldn't decide where to go, even after getting in the car. We wanted Mexican, but we have very different ideas of what good Mexican food is--I like the non-chain type restaurants, while he prefers On the Border. We agreed on Jose Pepper's because I do love their chicken and avocado enchilada and their Corona Shrimp Tacos are really good, too! I decided I needed to do something similar at home, so I decided to try some fish tacos at home.

FAIL!!!

If you have a good fish taco recipe, please share! These tasted like they had too much cumin in them or something. I had one bite, passed it to Norris, and ate a salad instead. Not good!! I even know I like fish tacos because I've had them before! Anyway, I'd be willing to try them again (although not for a couple weeks after the bad taste of those), so if you have something you'd be willing to share, please do.

Sunday, October 10, 2010

Spaghetti with Clam Sauce

This was another of Norris' requests--something he grew up eating and wanted me to make. I kind of knew before I made it that I wouldn't be eating it, but gave it a go anyway. Remember, I'm all about the textures, and the texture of the clams just don't agree with me. I did try it though, and the flavor was very good! Norris really liked it and wants it again, which is always a good sign. He said his mom would blend the clams with the sauce, so maybe I'll try that next time to alter the texture. This recipe is from Epicurean. It's a quick and inexpensive weeknight dinner!


(I didn't make a single change to the recipe since I'd never had it before, so the link gets you to the original!)

Tuesday, October 5, 2010

Whole Wheat Pumpkin Bread

Yep, another pumpkin recipe! This used my last can, so I'm hoping to find more in the store.
This recipe is definitely a keeper--it has the great pumpkin flavor and a really nice texture, but we keep this on the healthier side with whole wheat flour and honey. I cut the loaf into 14 slices and it runs about 170 calories per slice (not including any toppings, of course!). If you've worked with whole wheat flour before, you know it can get a little dense, but this had the perfect texture. Give it a try when you get your hands on a can of pumpkin!!
Also, it freezes well and tastes just the same when it comes out of the freezer. I will most definitely be making this again!


Whole Wheat Pumpkin Bread
1/3 cup unsalted butter, softened
1/4 cup honey
1/2 cup packed brown sugar
1 tsp vanilla extract
2 eggs
2 cups pumpkin puree
1 3/4 cup whole wheat flour
1/2 tsp salt
1 tsp cinnamon
1 tsp baking soda
1/4 cup water
1/4 cup raisins
(she used almonds and dark chocolate chips instead of raisins)
Preheat oven to 325 F.
Lightly grease a 9x5 loaf pan with nonstick cooking spray.
In a small bowl, whisk together flour, cinnamon, and salt.
In a large bowl, cream butter, honey and sugar together for two minutes. Add in the eggs and combine. Add in pumpkin and vanilla and beat just until combined. Beat in the flour mixture 1/3 at a time. Be careful to not overmix.
Dissolve baking soda in 1/4 cup hot water, then beat into batter.
Stir in raisins, nuts, or chocolate chips.
Pour (well, scoop, since it's not very pourable) into prepared loaf pan and bake about 60 minutes. Test for doneness, cool on wire rack, then consume!!

Monday, October 4, 2010

The dogs.

I know, another dog picture post. These made me laugh, so hopefully they'll make you smile today, too :)
Norris decided to try to take a picture of him with both the dogs. The first picture is what most of them turned out like...

The most normal one with them...
My attempt. Amazingly, Bear is now the camera looker and Bruno could care less!

I wanted to take another picture to compare with this one. Bear has gained a few lbs...clocking in at 82 lbs right now. Giant, I tell you! You should see his paw prints in the wet ground. I am forever reciting the poem "Something Big Has Been Here"..
And the pick-up. Bear still doesn't really care, but it's getting harder to do!
I think Bruno was jealous, because later he hopped up on Norris' lap. They are clearly lap dogs.

Saturday, October 2, 2010

Pumpkin Cinnamon Rolls

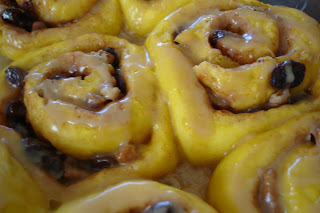
Pumpkin is back! Pumpkin is back! I love all things pumpkin--drinks, desserts, even savory items. I made a baked pumpkin oatmeal this week and these pumpkin rolls after finally seeing the reappearance of pumpkin at my grocery store. For a real pumpkin lover, they weren't strong in pumpkin flavor, but they were both still great!
I did notice when I logged on to write this up that I have been posting a lot of not-so-healthy items lately! Don't worry, there have been lots of veggies thrown in between, but I don't think anybody wants to see my mixed greens and chopped peppers... but I will admit that the first bite I put in my mouth this morning was a Frito left over from last night's get together, and the second bite was a sample of this caramel icing. I sampled ONE roll and promptly left for a sweaty treadmill session....only make these if you have a place to take them!!
I thought I dreamed up this recipe..I was sitting there one night and said to Norris..Oh my gosh, how good would pumpkin cinnamon rolls be??? I was thinking of my flavor combinations for about 24 hours when I decided I should check out Google, and of course, there were already a thousand recipes for them. So, why reinvent the wheel? I decided to try the one from food.com that had great reviews. It gives approximated amounts, so I'll give you the amount I used. I feel that the pumpkin in the dough just made it even softer, which was awesome. I could not decide on my icing flavor and bounced ideas off a couple of friends. I decided to make both cream cheese icing and a caramel icing (for comparison's sake, of course!!). I liked them both! "Dilemma" unsolved!
Next step is finding a pumpkin cinnamon roll that has an even stronger pumpkin flavor! If you have a suggestion, please shoot it my way!


Pumpkin Cinnamon Rolls
Serves:12

1/3 cup milk
2 tbsp butter
1/2 cup mashed pumpkin
2 tbsp sugar
1/2 tsp salt
1 egg, beaten
2 1/4 tsp dry yeast
1 cup all purpose flour
1 cup bread flour
1/2 cup brown sugar
1 1/2 tsp ground cinnamon
1/2 tsp pumpkin pie spice
1/2 cup raisins
2 tbsp softened butter
1/4 cup butter
1/2 cup brown sugar
2 tbsp milk
1/4 tsp vanilla
a couple of dashes of salt
1/2 cup confectioner's sugar
In small saucepan, heat milk and 2 tbsp butter until warm and butter is almost melted; remove from heat. In large bowl, combine pumpkin, sugar, salt, and milk mixture. Beat until well combined. Add egg and yeast and mix until combined.
In separate bowl, combine flours. Add half of flour mixture to pumpkin mixture. Beat on low speed for five minutes (instead of kneading..yippeee!!), scraping sides frequently. Add remaining flour mix and mix thouroughly for a very soft dough.
Spray a bowl with cooking spray and place dough into it. Turn dough to coat both sides with spray.
Cover and let rise until doubled (about an hour) OR put in fridge overnight.
Punch down down and turn onto floured surface. Knead a few times for a soft dough, using additional flour as needed. Roll dough into 12x10 rectangle.
Combine brown sugar and cinnamon in a bowl.
Brush surface of dough with melted butter, then sprinkle with brown sugar/cinnamon mix. Sprinkle raisins on top.
Roll dough and seal seam with a little water on your fingers. Cut into 12 1-inch pieces and place in greased 9x13 pan with a little space in between. Cover and let rise until doubled OR put in fridge overnight.
Bake rolls at 350 for about 22 minutes.
While rolls bake, make icing: In small saucepan, melt butter. Stir in brown sugar and milk and cook over medium low heat for one minute. Transfer to mixing bowl and allow to cool. Once cooled, stir in vanilla, salt, and confectioner's sugar. Beat until well blended.
Cool rolls for about 10 minutes, then drizzle with caramel icing.
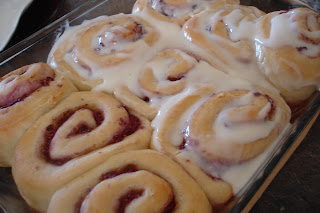
Oh, and have you made these yet?? I made them again with raspberry and strawberry and a thinned cream cheese icing and they're just as great! I should have planned and had enough powdered sugar to make the lemon glaze, but this was pretty great too!!


Wednesday, September 29, 2010

Pretzel Bites

These pretzel bites were awesome!! Perfect for a day of football and appetizers--we all loved them. They are also from Pennies on a Platter. She also has a version filled with ham and cheese, which sounds like something you can't possibly go wrong with!
They are even easy to make! It's a yeasted dough, but there isn't any kneading required. I made the dough the night before, refrigerated it overnight, then rolled, cut, boiled, and baked the morning of. They reheated perfectly, too. Norris wanted some ballpark/concession stand cheese, so I put that in the middle, and they were gone in no time! The only thing I would change for next time (and there will be a next time!) is brushing a little less butter on them. I melted the 1/4 cup called for, and used about 3 Tbsp total, and feel like I should have used more like 2 Tbsp total. I didn't have pretzel salt, so I used sea salt, and it did the same trick.


(I followed her directions exactly, so I'm just linking you!)