Friday, January 30, 2009

pictures to add...


I added a few pictures, and I had to share the pretty pears.

The cucumber cups picture is finally there too! Although...now that I look at the picture more, I noticed they forgot the tomatoes before we took the picture. They are prettier and more colorful with the tomatoes on them.

My students that are going to competition are preparing the cucumber cups as their app, spicy tangerine beef as their entree, and these pretty pears as their dessert. Four kids, one hour, two butane burners, no running water. Should be an exciting competition!

Almond Apricot Biscotti

I brought some of this home last night from the Pasta Party also. I had it around Christmas time and realized how ridiculously good it is, so I was excited that we made it again last night! We served it with pistachio gelato in a pretty clear cup, and it was just as good as I remembered! I left what I brought home sitting out for Norris to try, and it passes man approval also. :)


Almond Apricot Biscotti

1 c whole almonds, toasted
2 ¼ c flour
1 ½ c sugar
2 ½ t baking powder
1 t salt
½ c butter, cut into pieces
2 large eggs
¼ c brandy
2 t almond extract
1 c dried apricots, coarsely chopped
Optional: white or dark chocolate for dipping

1. Preheat oven to 350 F. Line a large baking sheet with foil or parchment.
2. To chop almonds and apricots: Place almonds in food processor and process off/on a few times until coarsely chopped. Transfer to bowl; set aside. Without washing bowl, add apricots in food processor fitted with a metal blade. Add ½ c sugar and pulse until apricots are chopped. Transfer mixture to a bowl for later use. (or just chop with a knife and add the sugar to your apricots)
3. Place flour, remaining sugar, baking powder, and salt in food processor. Drop in butter. Pulse a few times to cut in butter until mixture looks like small peas. Add eggs, brandy, and extract and pulse a few times to mix. Add almonds and apricots and pulse a few times just to mix ingredients.
4. Turn out onto a lightly floured cutting board. Divide dough in half. Shape each half into a 14-in log. Place on prepared baking sheets. Place pans on rack in center of oven and bake for 25-30 minutes or until golden. Remove and cool.
5. Reduce oven temperature to 300 degrees and cut logs crosswise into ½ inch slices. Arrange cut side down on cookie sheet. Return to oven and bake 10 minutes longer or until lightly toasted. Cool completely.
6. Biscotti may be drizzled or dipped in white or dark chocolate if desired.

Tuesday, January 27, 2009

Maple Brown Sugar Pork Tenderloin

I found a long lost (well, not THAT long, still good to eat!) half of a large pork tenderloin in the freezer and needed to find something to make with it. A quick search gave me this recipe from Joelen. The only change I made was to bake it in a 350 F oven for 10 minutes at a time, flipped sides and recovering with sauce from the pan each time, until done. Served with thinly sliced roasted potatoes with Herbs de Provence and sea salt on them and some salad, it was a warm and filling meal...perfect for a snowy evening!
I am just going to link to the recipe since I used her exact recipe and I don't have a picture..oops! Hers is droolworthy though, so just look there if you're a visual person:)

No snow day here....

but it's snowing like crazy outside and there is a considerable amount of ice on trees, cars, and the ground. Hmm.... sounds like another night of keeping warm on the couch! :) I started the 30 Day Shred yesterday and it is harder than I thought it would be! It's some of the best 20 minutes worth of exercise I've ever gotten at home, anyway!

A couple of years ago for Christmas, my cousin Carianne, a personal trainer and superfit superfly girl:), gave us all some recipe cards with some of her favorite healthy recipes on them. I have enjoyed every one I have tried, and gave this one a try today. It's really great, and an easy way to get in lots of veggies. I left the chicken out, and you can choose your own veggies. It's all in the sauce! No picture...but imagine just how colorful and crunchy this is. It would be a good side dish, or a big bowl full of this plus a container of yogurt makes a great lunch (yeah...that's what I just ate for lunch, I can say that from personal experience!!:)

Asian (Chicken) Salad

1 bag broccoli slaw (or ½ bag broccoli slaw, ½ bag coleslaw) mix (in produce dept.)
3 scallions, chopped
½ red pepper, chopped
½ green pepper, chopped
¼ c unsalted roasted peanuts
¼ c soy nuts
2 chicken breasts, cooked and chopped
(can add all of these, or whatever you prefer, in desired amounts)

Dressing:
2 T sesame oil (or veg oil)
1 T creamy peanut butter
½ c rice vinegar
2 T splenda or sugar
1 T plus 1 t lite soy sauce
¼ c water

Mix all salad fixings together as desired. Dissolve peanut butter in oil before adding other ingredients. May also add sesame seeds, Asian seasoning mix, and/or garlic chili sauce to “zip” the dressing a little.

Sunday, January 25, 2009

Pizza Salad


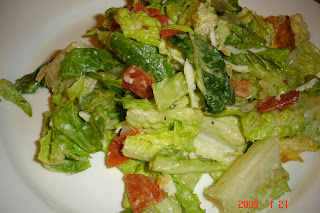
Since we are trying to get more greens into our diet, and I had leftover pizza stuff, plus leftover homemade spicy Caesar dressing, so I had to make something out of it! Our "leftover" meal will most likely become a regular on our dinner rotation...so good!


Pizza Salad


15 pepperonis
1 head romaine lettuce, washed and cut into bite sized pieces
1/2 c fat free mozzarella cheese
1/4 c fat free Italian dressing
1/8 c leftover spicy Caesar dressing (you could use all Italian--add some cayenne to it to kick it up a notch)
croutons (from the Caesar salad also...easy to make last minute)
1/2 cucumber, sliced into small chunks
**you could add any other pizza toppings, including mushrooms, peppers, olives, etc.

Get the croutons started first if you don't already have them made.
Chop the pepperonis into fourths. Cook them in a medium heat skillet. Place them on a paper towel to drain the fat.
Mix together the two dressings and chill.
Combine all of the ingredients and serve! (served with the pepperonis and croutons still warm to mimic pizza a little bit more)

Do you have a suggestion for a great meal made from leftovers of another meal? I'd love to hear it--I have cupboards full of small amounts of all sorts of things. Time to start working on that!!


Pizza Pizza!


I have not had great luck at many things yeast lately. I decided to re-try the pizza dough again, and after a little work (and quite a bit of extra flour!) my dough finally came to a good consistency and it turned out tasting great. It was somewhere between a thin and thick crust, which is what we like the best. I got this recipe from a quick search on allrecipes.com and changed it a little bit according to suggestions and our own liking. Topped it with some tomato sauce mixed with Italian herbs, pepperonies, mushrooms, and cheese. (Oops, forgot that I was out of mozzarella, so my lovely husband went to the store for me...came back with the best of intentions, fat free cheese...not so great to melt over a pizza! It still tasted pretty good, just not as melty (is that a word??) as it could have been. No complaints here--just thankful he went to the store for me!!) Served with a salad, it was a hearty Saturday night meal, and a lot cheaper than ordering in!


Quick and Easy Pizza Dough

(changed slightly by yours truly)


Ingredients:
1 (.25 ounce) package active dry yeast
1 teaspoon white sugar
1 cup warm water (110 degrees F/45degrees C)
1 1/2 c AP flour

1 c whole wheat flour

2 tablespoons olive oil
1/2 teaspoon salt

1 t Italian seasoning

1/2 t Pizza Seasoning (came in our spice rack...smells like it's similar to Italian seasoning)
Directions:
1.Preheat oven to 450 degrees F (230 degrees C). In a medium bowl, dissolve yeast and sugar in warm water. Let stand until creamy, about 10 minutes.
2.Stir in flour, salt and oil. Beat until smooth. Let rest for 5 minutes.
3.Turn dough out onto a lightly floured surface and pat or roll into a round. Transfer crust to a lightly greased pizza pan or baker's peel dusted with cornmeal. Spread with desired toppings and bake in preheated oven for 15 to 20 minutes, or until golden brown. Let baked pizza cool for 5 minutes before serving.


Spicy Tangerine Beef


I finally get to share this recipe! The only changes I would suggest to the original are that you up the spice a little (a few dashes of cayenne in the cooking sauce, or a crushed up dried red chile) and cut the honey back to 1 Tbsp rather than 2. Add any vegetables you like. I'd recommend bell peppers and carrots. Served atop rice sticks or jasmine rice and garnished with some toasted sesame seed and tangerine zest, it's a pretty dish also! (despite what my picture may show:)


Ingredients
3 tablespoons soy sauce
1 tablespoon cornstarch
1 pound flank steak or tri-tip, cut in thin strips on the bias
2 tablespoons dry sherry
2 tablespoons hoisin sauce
2 tablespoons honey
1 tablespoon chili sauce
2 tablespoons soy sauce
1/4 cup freshly squeezed tangerine juice
3 tablespoons canola oil
2 tablespoons minced fresh ginger
3 scallions, chopped
1/4 tangerine, zested
2 tablespoons toasted sesame seeds
Directions
In a resealable plastic bag combine the soy sauce and cornstarch and mix well. Add beef, cover, and let marinate for 20 minutes in the refrigerator.
Whisk together the sherry, hoisin, honey, chili sauce, soy sauce, and tangerine juice until completely combined.
In large pan or wok, heat oil on high. Add the ginger and beef and cook for 2 to 3 minutes. Then add sauce mixture and cook for another 2 minutes on medium heat until sauce thickens. Serve on warm platter, garnish with scallions, tangerine zest and sesame seeds.
And..I couldn't resist. I stuck this on him today and he didn't immediately knock it off. He must have been as cold as we were!! Brrrr!! Snow day tomorrow, anyone?!? Freezing rain day, anyway, which is way worse than snow!

Wednesday, January 21, 2009

Filled Cucumber Cups


We were in search of the perfect appetizer for our Spicy Tangerine Beef (recipe still to come, promise!) so we tried these today. They were awesome--a little different. Really fresh and a good crunch to them! I didn't get any pictures, so I just decided to go ahead and post the recipe (keyboard on home computer still not working). We are remaking them tomorrow with 3T of lime juice instead of 4. We also found that this filling filled two cucumbers' worth of the cups rather than 1. We hollowed out tiny little grape tomatoes, filled them, and put them on top of the cucumbers, with the fried scallions on top. They are SO good! I wish I had a picture of how to cut the cucumbers. Follow the instructions and they are easy and turn out great. You are basically making a "cup" out of the cucumber, and the top edges are cut in a zig zag pattern. Will take a picture tomorro when we make them again.

Recipe from Favorite Chinese Dishes


Filled Cucumber Cups

1 cucumber
4 scallions, chopped finely
4 T lime juice
2 small red chiles, seeded and chopped finely
3 t sugar
1 ¼ c ground roasted peanuts
¼ t salt
3 shallots, sliced finely and deep fried, to garnish

1. Wash the cucumber thoroughly and pat dry with absorbent paper towels.
2. To make the cucumber cups, cut the ends off the cucumber, and divide it into 3 equal lengths. Mark a line around the center of each one as a guide.
3. Make a zigzag cut all the way around the center of each section, always pointing the knife towards the center of the cucumber.
4. Pull apart the two halves. Scoop out the center of each cup with a melon baller or teaspoon, leaving a base on the bottom of each cup.
5. Put the scallions, lime juice, red chiles, ground roasted peanuts, and salt in a bowl and mix well to combine.
6. Divide the filling evenly between the 6 cucumber cups and arrange on a serving plate.
7. Garnish the cucumber cups with deep fried shallots and serve.


From “Favorite Chinese Dishes” cookbook

Monday, January 19, 2009

"Bierocks"

We have been both craving bierocks, and I was all set to make them today, including my own dough, but when I realized I didn't have enough yeast, I didn't feel like going to the store and lost some steam on spending a big chunk of time making them. Instead, Laine and I hit the gym for a new cycle circuit class that will leave me very sore tomorrow! We went to see Bride Wars too, which was a really cute movie. Definitely a good "girls day" movie! I got to play with my dog a lot today too, which was fun. It was another day of good weather here, and I was so thankful for that. Back to inservice tomorrow, and I am going to an Asian cooking class with my grandma and aunt tomorrow night, which should be fun!
Anyway, back to dinner, I decided to use the crescent roll dough I had in the fridge. I used this recipe for an idea of seasonings, and here's how I made them. I didn't take a picture because they were not that pretty, but I thought they were really good tasting, and quick! I will make the real dough soon, but try these to tide you over on the nights you don't want to mess with yeast.

1 container/tube of reduced fat crescent roll dough
1/2 lb ground meat (I used turkey, beef is traditional filling)
1 c shredded cabbage (optional; put it in to cook at the last couple minutes of the beef cooking if you use it)
1/3 c minced onion (optional; put it in to brown the whole time with the beef)
1 T Key West seasoning (basically lemon pepper)
2 T Worcestershire sauce
1/2 t salt
1 clove garlic, minced
1/3 c shredded 2% cheese

Preheat oven to 375.
Cook meat along with seasonings. (everything but cheese). I actually cooked my meat almost all the way, drained the fat and rinsed the meat, then returned it to the pan to finish cooking, adding the seasonings here instead of earlier. Crumble the meat really fine. Add cabbage at the end if using.
Remove skillet from heat; mix in cheese.
While meat is cooking, lay out the crescent rolls and pound them out with your hand as thin as you can get them.
Spoon about 1 T of the meat filling into the dough triangle. Roll it up by pinching the sides all together.
Bake for 12 minutes. We like to serve ours with ketchup and mustard.


I have to admit that the big pillowy doughy ones are better, but these had pretty great bierock-like flavor for being so quick. I had them in the oven within 20 minutes of walking into the kitchen. Can't go wrong with that!!

**The keyboard on my regular computer is not working, so I had to use my work computer. I can't send the pictures from that computer to this one because I can't type anything on that computer! I have some really great recipes with pictures stored up: Guy Fieri's Spicy Tangerine Beef, homemade pizza, and cucumber cups. As soon as I can get the keyboard up and running, I will share!
Hope everyone enjoyed their weekend, and hope you had the day off like I did:) Enjoy celebrating America tomorrow!

Wednesday, January 14, 2009

Creamy Enchiladas done Light


These were ready when I got home from the gym tonight, which was great! I made them after work and Norris popped them in the oven while I was gone. He even cooked the green beans, which were really good too!


This is adapted from Taste of Home Comfort Food "Diet" magazine. I have found a lot of recipes I really like in this book. I loved these enchiladas; Norris thought the last ones I made were better. I'm excited about that because that means I get the leftovers:) I will try another one next time, but I will definitely make these again--loved the filling. You could do it with chicken, also.


Two-cheese turkey enchiladas


1 lb extra lean ground turkey

1/2 c chopped green pepper (optional)

1 large onion, chopped (optional)

1 t brown sugar

1 t garlic powder

1 t chili powder

1 t spicy garlic seasoning

1 can (28 oz) crushed tomatoes, divided

4 oz reduced fat or fat free cream cheese

1/4 c fat free sour cream

3/4 c prepared salsa

8 fat free tortillas, warmed (I used white corn)

1/2 c shredded reduced fat colby jack cheese (or whichever kind you prefer)


1. Brown turkey along with pepper and onion in a skillet. Drain fat and rinse to get rid of any excess fat.

2. Return turkey to skillet and add seasonings. Stir in 1 cup crushed tomatoes and simmer uncovered over low heat for 10 minutes, stirring occasionally.

3. Meanwhile, combine sour cream, spicy garlic seasoning, and cream cheese with mixer. Set aside. Mix 3/4 of this mixture into the meat mixture in the last 2 minutes of simmering. Stir well to combine.

4. Prepare 9x13 pan with baking spray. Combine salsa and remaining tomatoes and spread 1 cup of this into the bottom of the pan.

5. Spread a small amount of the cream cheese mixture onto a tortilla, fill with about 1/3 c turkey mixture, and roll. Place seam side down into dish. Finish this process with the rest of the meat mixture.

6. Spread remaining tomato/salsa mixture over the top and sprinkle with cheese.

7. Cook uncovered for 25 minutes at 350 degrees F.

Asian Appetizers: Trial 1


We are trying to come up with an asian appetizer to go with our spicy tangerine beef (recipe to come tomorrow, hopefully!), so today we made this Edamame Salad, kind of. The colors are so pretty! We are still looking for the "perfect" recipe, but until then, this is something fun and a little different. I would imagine it to be good with some crockpot mongolian beef, since it is like slaw.
Just look at the pretty colors!

Our recipe, slightly adapted from here.

Edamame Salad


Ingredients:
***Edamame***
1 1/2 pounds frozen edamame
4 quarts water
2 tablespoons table salt

***Dressing***
1/4 cup rice wine vinegar
1 tablespoon vegetable oil
2 teaspoons light soy sauce
1 tablespoon honey
1 teaspoon lemon juice
1 1/2 teaspoon coarse salt
1/2 teaspoon white pepper
1 tablespoon finely minced shallot

½-3/4 c julienned carrots
½-3/4 c julienned jicama

Directions:
For the edamame: Add salt to water in a large stock pot. Bring to boil, and add edamame. Cook for five minutes and drain. Rinse immediately with cold water. Drain well and set aside.

For the dressing: In a large, non-reactive bowl, whisk vinegar, oil, soy sauce , honey, lemon juice, salt and white pepper.

Add drained edamame to bowl. Add carrots and shallot. Toss well to combine. Chill at least two hours to allow flavors to combine.

Bring to room temperature 30 minutes before serving.

Tuesday, January 13, 2009

Chicken Caesar Salad with Zesty Croutons


First, a picture from this weekend. Norris was hanging out in the garage waiting for some friends to come over (because what's more manly than watching football in the garage, anyway?!?) and Bruno claimed his chair, too!

So, on to the food...
You're wondering why my caesar salad is enlightened, right? Well, because the average dinner portion of this stuff averages around 900 calories or so, so compared to that, anything is light, right? This really is okay to eat, you New Years Resolutioners!
This is not your typical caesar--it has a bit of a kick. The mayo is used in place of the egg for stability.
Don't be scared to make your own dressing and croutons. Prepare the chicken however you like, but don't add a bunch of fat when you do!
Funny story on the anchovy paste--I was squeezing the tube at the front and the back end of it popped open and got on my pants, arm, shoe, and across the kitchen. I did not smell so nice the rest of the night! Be careful with this:)

Lightened Up Caesar Salad with Zesty Croutons and baked chicken


Salad dressing:
1/2 c light or nonfat mayo
2 T red wine vinegar
2 t Dijon mustard
2 t white wine (optional)
1 t Worcestershire sauce
1 t anchovy paste (optional, but does add depth to dressing; ask your grocery if you don't know where it is at your store)
1 clove garlic, minced
1/8 t ground red pepper

Croutons:
2 c sourdough bread cubes
1/2 t Creole seasoning
1 clove garlic, minced
1 T olive oil

Salad:
2 heads washed romaine lettuce cut into bite sized pieces
1/3 c freshly grated Parmesan cheese (or we just put a little from a can of it, which made us use a lot less, a good thing!)
5 boneless skinless chicken tenderloins

1. Whisk together mayonnaise, vinegar, mustard, wine, W sauce, anchovy paste, garlic, and pepper in a bowl. If time permits, cover and chill for at least one hour for flavors to blend.
2. Preheat oven to 350 degrees. Combine olive oil, garlic, and Creole seasoning in a small dish. Pour over bread cubes and gently toss to coat. Spread bread cubes in a single layer on a rimmed baking sheet. Bake, stirring every 10 minutes or so, for about 25 minutes, or until bread cubes are golden.
3. Season chicken however you like (I used some spicy garlic seasoning) and bake in a 375 oven until golden, about 25 minutes. Let rest for five minutes before cutting. Cut on the diagonal into bite sized pieces.
3. Place lettuce and croutons in a large bowl (I reserved some croutons for serving, and had leftover). Add dressing and chicken and toss to coat thoroughly. Sprinkle with cheese and serve.
Sunday, January 11, 2009

Baked Shrimp


Just like the title of the recipe says--this is easy baked shrimp! We were grilling last night (yes, still a little cold for that!) and had some people over so I popped this in the oven while the meat was on the grill. Simple ingredients (use regular paprika, dried dill, regular bread crumbs if you don't have what it calls for). Here is the original recipe. It's something that everyone liked--Enjoy!
Easy Baked Shrimp

Prep Time: 45 minutes
Cook Time: 15 minutes
Ingredients:
1/4 cup olive oil
1/2 cup orange juice
1 Tablespoon soy sauce
2 Tablespoons honey
2 garlic cloves, pressed
1 pound peeled fresh or frozen thawed shrimp, tails on optional
2 Tablespoons fresh dill weed, leaves stripped from stem
1/2 teaspoon ground cayenne pepper (red pepper), or to taste
1 cup panko (Japanese bread crumbs)
1/2 teaspoon kosher salt
1/2 teaspoon sweet Hungarian paprika
1/8 cup chopped chives
1/4 cup grated Parmesan cheese

Preparation:Preheat oven to 450 F (425 F for glass).
Line a shallow baking dish with nonstick foil or spray a glass baking dish with vegetable oil. Measure olive oil, orange juice, soy sauce, and honey.
Squish to combine and add shrimp.
Toss to coat shrimp. Refrigerate 15 minutes.
Combine dill weed, cayenne pepper, panko, and kosher salt until well-blended.
Remove shrimp from marinade with a slotted spoon and place in baking dish along with 1/2 cup of the marinade. Spread shrimp into a single layer.
Sprinkle evenly with the seasoned panko mix, then top with grated Parmesan cheese. Refrigerate for 15 minutes.
Bake shrimp 12 to 15 minutes until lightly browned.

Yield: 4 servings

Thursday, January 8, 2009

Cinnamon Vanilla Poached Pears

a pear with a hat!

This is one of my new favorite desserts. I saw someone do this and then read a bunch of articles getting ready to do them for my class. I decided on cinnamon vanilla and put together this recipe (although I'm sure someone out there has done the same thing). Oh, and my kids loved them so much (high school students) that I didn't get a picture before they were gone!
edit: added pictures this time around!

Cinnamon Vanilla Poached Pear


2 c water
1 c sugar (or more, if you have more pears; just make sure you have two parts water to one part sugar)
2 cinnamon sticks or 1 t of cinnamon oil
1 T pure vanilla extract (or go all out and buy a vanilla bean and split it!)
2 pears

Peel and core pears. Cut in half lengthwise.
While preparing pears, heat water, sugar, and flavoring to a low simmer.
Carefully lower pears into simmering water, being sure that they are next to each other, and not on top of each other in the water. Continue to simmer for anywhere from 8 to 20 minutes, depending on original ripeness of pears. (If it started out pretty crisp, it will take longer). Check doneness with a very thin blade knife. When it meets the pear with little resistance, it is done.
Take the hot pot off of the heat. Cool pears in the liquid they cooked in.
After cooling, remove the pears to a plate or container (can be refrigerated a day before).

(Optional): Put the liquid back on the stove and reduce it to about one cup of sauce by simmering it. (Don't boil it, or you will end up with caramel or hard candy!)Use this sauce to pour over the pears to serve.
Garnish with orange zest.

Ginger Flank Steak

If you want something with a little kick, try this!
I got the general idea from Rachel Ray's Express Lane Meals, and we changed it for our class. We are practicing competition recipes, and the kids really liked this. Take the spice down a notch with less red pepper.

Ginger Flank Steak

1 T ground ginger
1 T sesame seeds
Zest and juice of 2 limes
5 T vegetable oil
2 t salt
1 t paprika
½ t black pepper
¼ t onion powder
¼ t garlic powder
¼ t cayenne pepper
1 dash coriander
1 dash turmeric
(or you can use steak seasoning in place of everything from salt-turmeric)
2 lb. flank steak

Preheat a skillet to medium high (or outdoor grill).
Combine the ginger, sesame seeds,lime juice, and other seasonings, and 3 T of the oil. In a large ziptight baggie, combine this and the meat and shake to coat. Let sit for 10 minutes.
Cook over medium high on each side for 6-7 minutes.

Let the meat rest for 5 minutes, then thinly slice it on an angle against the grain.
We served this with seared cabbage (Rach's suggestion) and it was really great!

Wednesday, January 7, 2009

Creamy Cajun Sausage Pasta

I got this recipe from Colleen and changed around some things according to what I had. I have been really trying to cook from what I already own, without buying extra things besides vegetables, fruits, and milk, so with lots of changes, here is my version of the recipe! (Click the link to the original recipe, which is Creamy Cajun Shrimp Linguine)

Creamy Cajun Sausage Pasta

6 oz. uncooked rotini
2 turkey Italian sweet sausages (although any other sausage would work fine too), sliced on the diagonal into about six pieces per sausage
2 T Smart Balance "butter"
1 can sliced mushrooms (or one 8 oz. package presliced mushrooms, or slice your own!)
1 T 1 t all purpose flour
1 t Cajun seasoning (I used Creole--again, what I had)
1 t any other spicy seasoning you have (I have a spicy garlic crusher seasoning, used that)
1/4 t salt
1 c skim milk
1 T margarine, or more of that SB butter
1/4 c chopped fresh parsley

Bring medium pot of water to a boil. Add pasta and cook according to package directions.
In a skillet over medium high heat, cook sausage pieces.
In a small skillet or saucepan, melt butter. Add mushrooms (and other veggies if you want); saute 4 minutes or until moisture evaporates. Add flour, seasoning, and salt to pan; saute 30 seconds (will be thick). Stir in milk and 1 T margarine/butter; cook about two minutes until sauce thickens, stirring constantly. Remove from heat.
After draining pasta, combine pasta, sauce, cooked sausage, and fresh parsley.

Sunday, January 4, 2009

English Muffin Bread


My pictures are not necessarily inspiring or appetizing, but this bread is great! We love English muffins, so the bread has to be good--you can get even bigger pieces and still "just eat one":)
It has a crunchy outside texture like the real deal. Don't skip the cornmeal sprinkling. I have seen this recipe a lot on the web lately, most recently here and here. Both of these sites also have better pictures and plenty of other great recipes! The original recipe comes from Better Homes and Gardens.
English Muffin Bread
Yield: 2 loaves
Ingredients
Cornmeal
6 cups all purpose flour
2 packages active dry yeast
1/4 teaspoon baking soda
2 cups milk
1/2 cup water
1 tablespoon sugar
1 teaspoon salt
Preparation
1. Grease two 8x4x2-inch loaf pans. Lightly sprinkle pans with enough cornmeal to coat bottom and sides; set pans aside.
2. In a large mixing bowl combine 3 cups of the flour, the yeast, and baking soda; set aside. In a medium saucepan heat and stir milk, water, sugar and, salt just until warm (120 to 130 degrees F). Using a wooden spoon, stir milk mixture into flour mixture. Stir in remaining flour.
3. Divide dough in half. Place dough in prepared pans. Sprinkle tops with cornmeal. Cover and let rise in a warm place until doubled in size (about 45 minutes).
4. Bake in a 400 degree oven about 25 minutes or until golden brown. Immediately remove bread from pans. Cool on wire racks.

Friday, January 2, 2009

Happy 2009!

Welcome to 2009!
My resolution/ "areas to change/improve":
-carry a smaller purse! (mine is more like a suitcase that makes my back hurt!)
-hang shirts back up after trying them on in the mornings rather than having a whole pile at the end of the week to hang up. this will also keep the guest room much cleaner
-take good care of my doggy!! Take him on frequent walks and play with him a lot!

Pretty simple stuff, huh? I think these are better for me than really broad areas of improvement--one year, my resolution was to start washing my face at least once a day (had not done it before and never had a problem with pimples, etc., but I was a jr. in college and figured I better start!!), and I still do it. So, as long as my "resolution" is small and specific, I will hopefully be successful!

NYE party..oh my goodness. It was a lot of fun and we had a ton of food and drinks and people! Perfect way to start out the year. These obviously aren't full yet, but we had to have a makeshift extra food area on cardtable because we ran out of space in the kitchen. We wound up having two more giant crockpots full of dip stuff that a friend brought.
My buffet server in action:) That buffalo chicken dip is just a hit. This time I made it layered, so that the color was a little more appealing (not that people didn't eat it before...I just wanted to make it look prettier) and I baked it in a 350 degree oven for 22 minutes. Then I let it stand and kept it warm in the serving trays on the top of the buffet server. I didn't really take pictures of the food or really even of the people..I'm going to have to request those from my awesome co-host, Laine!


Aaand...ta-dah! Another new source of entertainment in our basement! We picked up Norris' old Ms. Pacman and got it down in our basement! I definitely do NOT have the high score...I will have to work on that.

And another Bruno photo..he went to his first vet appt. today and was, as always, very friendly. He even still liked me after he got a shot (distracted by a treat, I suppose). We went for a walk and then he played outside and got all kinds of muddy, like a little kid. When Norris went to get him from outside, he was really muddy, and when I got home, after he had had all afternoon to lick himself clean, he still had mud on the top of his head (??), all over his paws and his mouth. I gave him a shower (Suave is a dog product, right?!?) and he was so irresistably cute after coming out of the shower that I had to snap a picture of him. He even posed! He likes showers so much that he runs into the bathroom and sits on the rug outside of the shower to wait for us to come wash him. Hopefully this trait sticks! Vet said he's healthy and happy..have to go back in 3 weeks for another shot...I am hoping the treat trick will work again!